Knowledge of titanium steel jewelry
工厂介绍
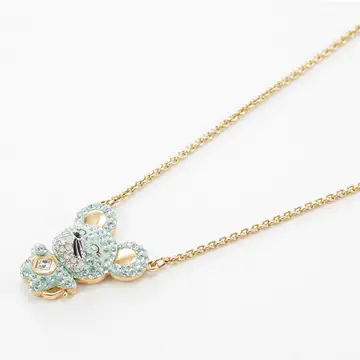
fancy necklace display
by:Keke Jewelry
2020-04-13
Learn how to present your jewelry pieces at a craft fair, a supplier fair, or at home, and make exquisite necklace displays.
Print the template to 8.
5x11 sheets of paper.
Cut it out and trace it to thin cabinet grade plywood, cardboard or other thin and sturdy material.
You can even use plexiglass if you want a transparent display.
Cut out the template and track the design onto the plywood, then cut it out using a rolling saw.
Super easy and super fast.
Once you cut the plywood off, gently polish the edges.
Now you can start painting, start at the edge and draw the front. (
When the back is painted, I will explain it in the following steps)Let dry.
I used 220 of the sand and wiped it clean with very fine sandpaper.
Brush your last coat now.
Note: I use the Behr porch and floor paint as it is on hand as I want my necklace display to match my studio but you can use whatever you have
When your second layer of paint is dry, you can stick some wood appliances to the front.
I used 3 of the Beacon-in-
1 Process adhesive, it works well and it dries fast so I don\'t have to wait before applying.
This is what you need to do next.
Brush a coat of paint on the appliance and dry it.
You can make a second coat if you feel it is necessary, but you don\'t have to sprinkle sand between the two.
For my base I want something with personality and I found it on this old wooden scroll.
It has been doing nothing for years, so I decided to make good use of it.
First cut the top directly with a handsaw so you can get a good angle cut.
Second, keep your display board on the line axis, decide what angle you want the board to set, and mark the line axis with a pencil.
Now you will cut the angle with a hand saw and lift your display board in dry condition to make sure you like the angle of the cut.
The last step is to stick the wire shaft to the back of the board (
That\'s why you \'ve been waiting for the sore back, so the glue can get good and firm bonding and you can paint the back after the glue is dry)I used E-
6000 jewelry adhesive, mainly because this is what I have on hand and also because it is a good strong glue that can glue almost anything.
I also support the spool so it can be flat on the board until the glue is dry.
You can also tape it in place with masking tape until it dries.
Now that your display board is glued to the stand, you can add characters by adding some paint layers. 1.
Gently brush some white stripes from the top to the bottom of the board, which gives a good weathering effect.
Dry completely. 2.
Now mix some brown acrylic paint and water to make a \"stain \".
Brush your board and wipe it clean quickly with a damp cloth.
This leaves a darker paint in the cracks and details of your app and reduces the brighter color in your previous paint layers. Let dry.
You can now brush a layer of sealant, or spray some of it, or keep it as it is, and applying a paint chip here or there will only enhance the effect.
Now you are ready to hang your handmade jewelry pieces and present them in a stylish way. Enjoy!
Custom message
Related Products